A design statement may seem like an unnecessary formality. Yet, documentation plays a vital role in leading the project to fruition. For example, a design statement is a short way to introduce yourself to a client, such as your design vision, timeline, and team members, to name a few. It’s like an elevator pitch. When done correctly, it can establish a solid foundation for client relationships.
In this blog post, we’ll explore how to write a design statement that does just that—backed by examples and actionable tips.
What is a design statement?
A design statement is a document and a design process tool where you specify your ideas, goals, and plans. It sets the tone for the entire design process and captures the following:
- Project Objectives: The specific outcomes the design proposal intends to accomplish, such as addressing user pain points or improving usability.
- Intended Users: The people the design is created for, including their needs, behaviors, and expectations.
- Design Constraints: Any limitations or obstacles that must be taken into account, such as technical requirements, time, or budget.
- Guiding Principles: The key themes or values that shape the design approach, like inclusivity, minimalism, or creativity.
It guides the internal design workflow from conception to launch and informs design decisions.
Why is a design statement important?
Before proceeding with the design, you first need to create a reference point. In other words, it’s a design statement. This document pertains to all parties involved, from clients to designers. Moreover, it helps persuade people to choose you as their designer, as you can include your unique value proposition in the statement. Thus, it becomes a critical selling point.
Design statement vs. design brief
There is often confusion between a design statement and a design brief. But they’re different. The latter is more limited in what it contains. Usually, it encompasses just the requirements. It tells the designer what to do, so the client knows exactly what result to expect.
On the other hand, a design statement is more about the reasons for this or that solutions and the ways to introduce them. In short, the “how” and “why.” It demonstrates the strategy, the creative direction, and the specific design decisions shaping the project. A design statement is more than a directive. It explains why you’re doing something and how you’ll achieve it.
Components of a design statement
Let’s examine the essential elements of a high-quality design statement.
Project overview & problem definition
The project overview section should give a clear and concise snapshot of the project and define the problem you’re solving. Thus, it should represent an effective problem statement.
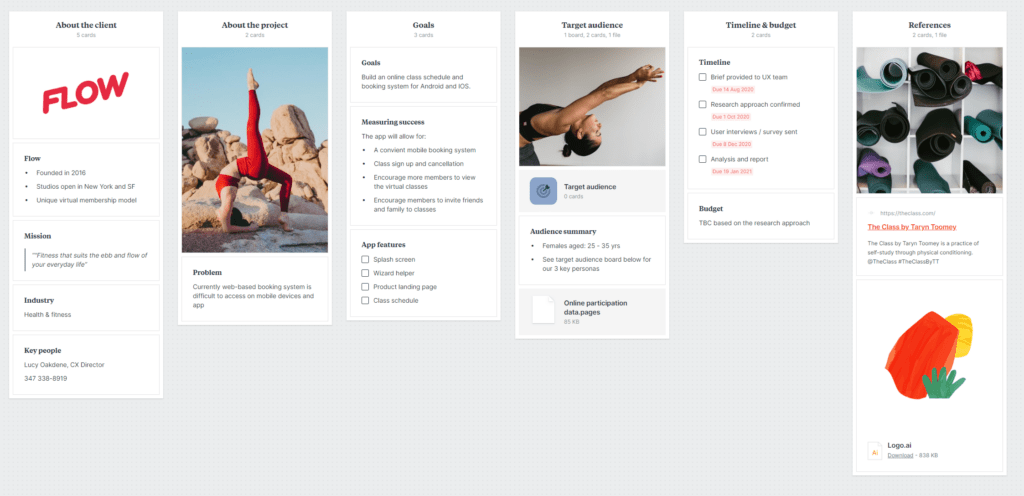
Let’s take a custom web design project for an online store. The first section may look like this:
“We need to renovate the existing website. It doesn’t reflect the brand, is challenging to navigate, and looks outdated. People struggle with finding the right products and frequently bounce. The redesign should result in higher usability, user engagement, and conversion rates.”
User needs & research findings
To craft a human-centered design that resonates with the target audience, you need to take into account the needs of real website visitors or app users. That’s where you need to dig into the user data. To collect relevant information, employ user research, user feedback, and advanced tools like business intelligence.
Performing a UX audit can also help uncover problems with the existing design and set a direction for the enhancements.

Design objectives & principles
Identifying the goals you (and the client) have for the new design is a crucial step in project planning and design statement drafting. The clearer they’re described, the easier it is to reach the best results. Here are the questions you may ask when setting design goals:
- What would the perfect result for this project look like?
- Are you revamping an already-existing solution? Why?
- Do you have similar projects in your portfolio?
Proposed solution
That’s where you zero in on the “how” behind addressing the project’s challenges. You need to present a clear and compelling vision of what the final product will look like and how it will function. Here, you need to sell the design proposal and demonstrate how it meets user needs and aligns with the project’s goals.
KPIs and constraints
The last section of your design statement should go over your work’s impact and measurement strategy. That’s when key performance indicators (KPIs) take center stage. Outline specific metrics, such as:
- Performance: page load time, system uptime;
- User engagement: time on page/screen, click-through rate (CTR), bounce rate;
- Conversion: conversion rate, form completion rate;
- User satisfaction metrics: Net Promoter Score (NPS), Customer Satisfaction Score (CSAT);
- Usability: task success rate, error rate, time to complete task;
- Adoption and retention rates;
- Business impact: Revenue per User (RPU), Customer Lifetime Value (CLTV);
- Accessibility: accessibility compliance rate, user feedback from disabled users;
- A/B testing results: improvement in variant performance.
The final design should meet these standards. Additionally, write down the constraints, including any financial, time, or technological ones.
To maintain project momentum and prevent scope creep and disagreements later on, it’s imperative to make these limitations and expectations clear from the outset. The timeline and the budget must be reasonable and adaptable enough to allow for future adjustments or unforeseen challenges.
To obtain the required data, consider posing the following questions:
- What financial restrictions apply to this project? To what extent are they flexible?
- What internal deadlines must this project adhere to?
- What are some major project milestones?
How to write a design statement in 5 steps
So, let’s provide more details on preparing a design statement for a project. The design thinking process is not that hard and can be broken down into five steps.
1. Begin with thorough research
The first step is conducting research to understand your market, competition, and audience.
User research
Who will be utilizing your product? You need to know who they are (demographics and technographics), what they need (likes and dislikes), and how they interact with your product (habits and preferences). Why do you need it? To know what features to add to provide real value, improve user satisfaction, and boost engagement.
You can gather data through several channels:
Competitive analysis
Use competitive analysis to look at your competitors. When you understand what’s already out there, you can determine whether you need to replicate something in your design, too, while differentiating the product from the rest.
One fundamental principle here is Jakob’s Law. It states that as users spend most of their time on other sites, they get accustomed to their looks and feel and prefer your site to function similarly.
This doesn’t mean copying your competitors. All you need to do is to take into account user expectations. Your design should still be unique to stand out. By analyzing successful examples in your industry, you can adjust your solutions to meet user expectations while also innovating.
Stakeholder interviews
Don’t forget about the people behind the scenes:
- a planning officer;
- product teams;
- a design agency you’re working with.
Conduct stakeholder interviews to garner insights into the business goals, user needs, and technical constraints that will shape the design. By involving them early in the process, you ensure that your design aligns with the project’s strategic objectives and gets the necessary buy-in from key decision-makers.
2. Create helpful UX artifacts
As a project progresses, designers generate research records, sketches, design files, prototypes, and various reports. These are referred to as UX artifacts or UX deliverables. Here is what you should develop.
User persona
It’s a description of your ideal customer. It includes details like demographics, goals, behaviors, and pain points. You need to keep this user front and center throughout the design process.
User journey map
This document visually represents a user’s steps to achieve a specific goal on the site or app. By dividing the path into several stages and tracking down every step, you can identify friction points and opportunities for improvement. As such, you can use this information during the design phase to make the journey smoother and more satisfying.
Empathy map
What emotions do users have regarding your product? Empathy maps are a way how to explore what people say, think, and feel to make informed decisions.
3. Define the design improvement area
Use the 4Ws technique
This technique delves into the 4Ws (Who, What, Where, and Why):
- Who is your target audience?
- What are their needs?
- Where do they experience challenges?
- Why are these issues occurring?
Answering these questions will help you identify where your design needs improvement.
Employ the JTBD framework
JTBD stands for Jobs to be Done and is another powerful tool for defining the design improvement area. This framework focuses on what the user tries to accomplish with your product—their “job to be done.”
By understanding the user’s goals and the context in which they’re utilizing your product, you can design solutions that better meet their needs and expectations. It’s about looking beyond features and focusing on the real-life outcomes your audience wants to achieve.
Analyze research data with affinity mapping
The collected data will most likely have similarities and lead to a specific result. So, unite related data points. This process is known as affinity mapping.
Let’s take an example where you aim to enhance the customer experience. You need to group all concepts linked to this task. You’ll cluster similar ideas together and generate a visual depiction of the measures to take to improve the CX.
💡 Pro Tip
Learn more about affinity mapping.
4. Set the goal and choose KPIs
The next step on the “how to write a design statement” journey revolves around goal setting. We’ll give additional details on this topic further. Now, you need to consider your constraints to establish realistic goals and stay on track. Some common design goals may be around raising brand awareness, attracting new customers, enhancing the UX/UI, and increasing sales.
Whatever it is, make sure that the goals you set are clear, measurable, realistic and time-bound.
Choose the right KPIs from the list mentioned above. You’ll need these figures to benchmark your design against, from user engagement to conversion rates. At this stage, identify your design principles, such as user-centricity, simplicity, consistency, accessibility, etc.
5. Describe the proposed solution
Now, it’s time to bring it all together and shape your design ideas. Develop a design schematic (a visual representation of the design concept).
The design schematic will differ depending on your sphere of interest. If you’re a UX designer, it should be a prototype showing the layout, functionality, and flow of your design. If you’re an interior designer, the design schematic should include floor plans, elevations, and 3D renderings. It’s essential for guiding the development/building process.
But don’t just stop at the visuals. Explain how your solution addresses the problems you identified and meets your goals. Show how the design is not just functional but also innovative. It’s about more than just solving problems. It’s about creating something that works, resonates, and excites.
4 Best practices for writing design statements
Use the SMART technique for project goals
Setting goals isn’t just about outlining what you desire to achieve. The goals should follow the SMART principle: They should be Specific, Measurable, Achievable, Relevant, and Time-bound.
The first two characteristics allow you to track the goal. For example, instead of saying, “Improve user engagement,” say, “Increase time spent on our dashboard design by 20% within three months.” This way, you have a clear target and a timeframe.
Achievable goals make sure the team doesn’t chase the impossible. Thus, it minimizes the chance of getting discouraged. Relevant goals entail aligning efforts with broader business objectives. Being time-bound adds urgency and focus.
Validate assumptions about users
The next piece of advice on how to write a research design statement is to use data to prove your assumptions. Even after researching the audience, you need to validate your ideas by collaborating with real users through surveys, interviews, and usability tests.
What you learn can be surprising. Maybe you thought your users preferred a minimalist layout, but research shows they crave detailed, comprehensive designs. Having this figured out early on helps you avoid pitfalls and makes solutions truly user-centered.
A great example of this is in mobile app design. Designers might assume that people want intricate, feature-rich interfaces, but through research, they discover that customers actually prioritize a lot of white space and large, easy-to-tap buttons. This insight leads to a more practical design that resonates with user needs.
This isn’t just useful in mobile app design; it can come in handy when optimizing mobile catalog CRO, creating marketing materials or designing a website.
Avoid professional jargon
Let’s face it—not everyone is so profoundly educated about your industry. Thus, jargon, while understandable for you, can be alienating for the rest.
Experts often fall victim to the cognitive bias known as the curse of knowledge. They forget what it’s like to be a novice. They’re so deeply entrenched in their field that they forget what it was like not to know everything, including specialized terminology.
Thus, take a step back and simplify the language of your design statement. This ensures that more people will comprehend your design vision. If a term isn’t clear to someone without a design background, skip it or explain it.
Take this approach: instead of saying, ‘We will enhance the UI’s heuristic evaluations,’ try, ‘We’ll improve the user interface by testing it with real users to guarantee ease of navigation.” Clear communication eliminates barriers and leads to better collaboration.
Incorporate user stories
At last, you need to create user stories. These are simple, narrative descriptions of a feature from the user’s perspective. They typically follow this format: “As a [type of user], I want [an action] so that [a benefit].”
It’s another way to stay user-focused and provide value through the design. For example, “As a busy parent, I want an easy-to-use app to order groceries online, so that I can save time for my family.”
By reading this, you’ll immediately understand what design elements to prioritize, namely simplicity, efficiency, and user convenience. User stories are a staple in human-centered design thinking, ensuring you solve problems in a meaningful and effective way.
Wrapping up
Now, you’re equipped with the knowledge of how to write a design statement. We’ve explored what a design statement is, why it’s crucial, and how to craft an effective one. As you can see, it’s not a design brief. The design statement highlights the reasons and methods behind creating a certain design solution.
Follow the steps outlined in this guide, from laying down the objectives to choosing the relevant KPIs. Stick to a structured approach. By completing each stage properly, you’ll be able to leverage your statement to persuade stakeholders to invest in your ideas while complying with the broader requirements.
Focus on user needs, define where your design needs improvement, and describe the proposed solution in simple terms. Let your design statement be a powerful tool for transforming ideas into actionable, successful outcomes.